

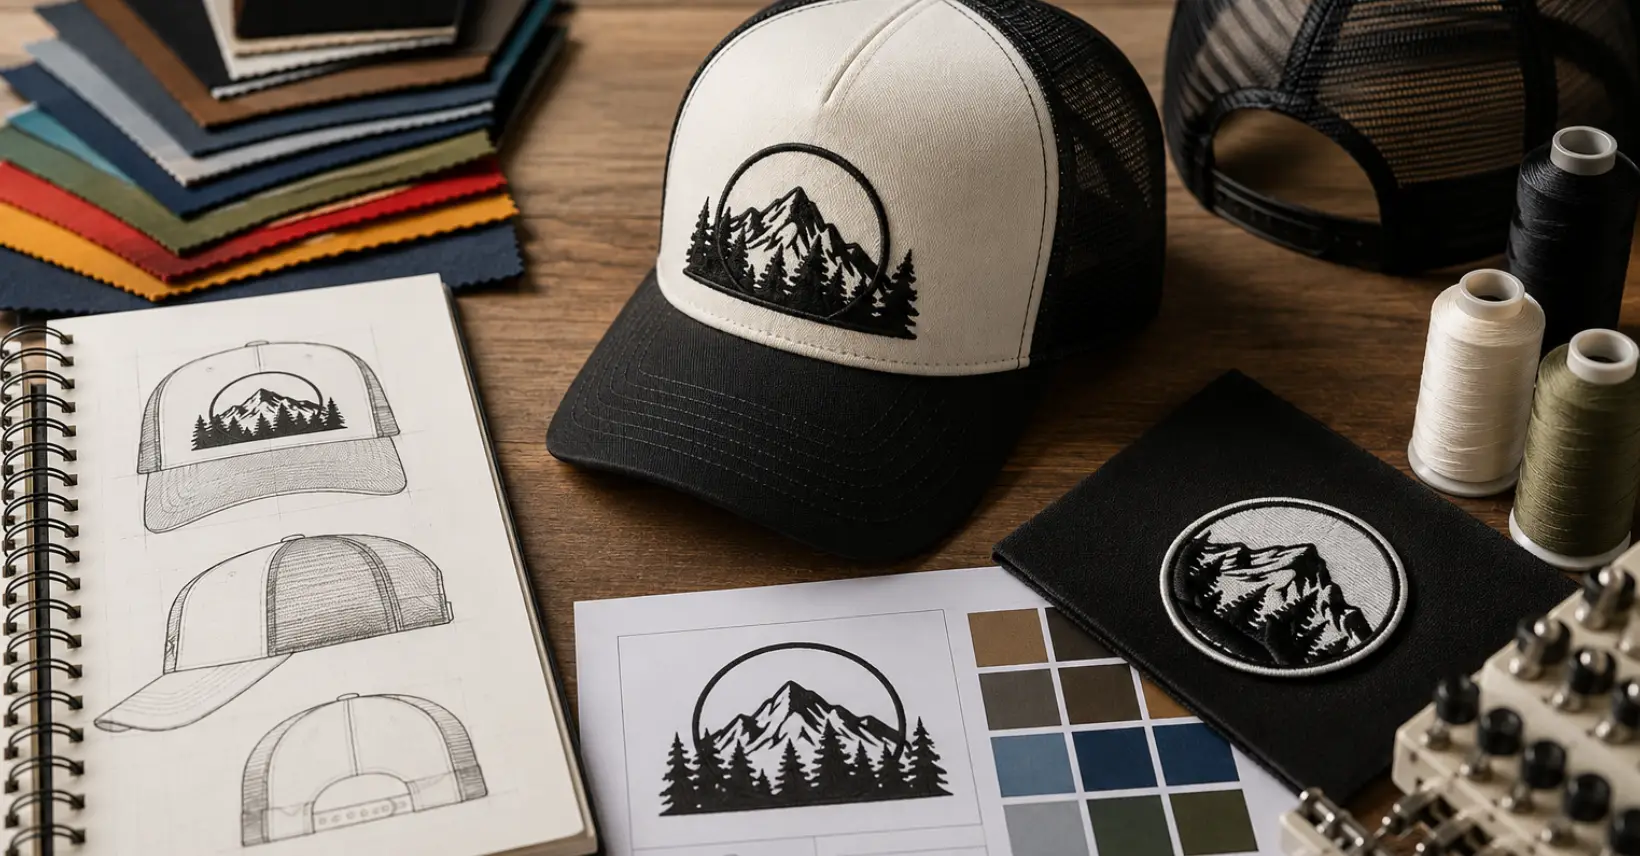
Trucker caps have evolved far beyond their traditional workwear roots. Today, they are a popular choice for businesses, clothing brands, sports teams, outdoor enthusiasts, events, creators, and anyone who wants headwear with a distinctive personality. Their structured front, breathable mesh back, curved or flat brim, and adjustable closure make them both practical and highly customizable.
But designing your own trucker cap is about more than simply placing a logo on the front. The best custom trucker caps are carefully planned around the cap’s shape, fabric, colours, decoration method, logo size, placement, and intended audience.
Whether you’re creating branded caps for your business, launching a clothing collection, preparing merchandise for an event, or simply designing something personal, understanding the design process can help you create a cap that looks professional and feels worth wearing.
At Custom Cap uk, we help turn creative ideas into custom headwear that combines strong visual design with quality craftsmanship. This guide explains how to design your own trucker caps from the initial concept through to the finished product.
What Is a Trucker Cap?
A trucker cap is a distinctive style of baseball cap traditionally recognised by its structured front panel and breathable mesh back. Most trucker caps also feature an adjustable snapback closure, making them suitable for a wide range of head sizes.
The classic design usually consists of:
- A structured front panel
- Mesh rear panels
- An adjustable snapback
- A curved or flat brim
- A sweatband
- A crown that can be mid-profile or high-profile
The combination of a solid front and ventilated back is one of the reasons trucker caps remain popular. The front provides a strong area for branding, embroidery, patches, or other decoration, while the mesh allows airflow.
Modern trucker caps are available in many different materials, colours, profiles, and finishes. This gives designers considerably more freedom than the traditional trucker style might suggest.
Why Design Your Own Trucker Caps?
Creating your own trucker caps gives you control over almost every visual element.
Instead of choosing a generic cap with someone else’s branding, you can create headwear that represents your business, personality, campaign, team, or clothing line.
1. Build Brand Recognition
Custom trucker caps can become an effective part of your branding strategy.
A well-designed logo positioned on the front of a cap can turn customers, employees, sports teams, or event attendees into walking brand ambassadors. Unlike many forms of advertising, a useful piece of headwear can continue generating visibility long after the original campaign has ended.
2. Create Merchandise
If you’re building a clothing brand, trucker caps can make an excellent addition to your merchandise range.
You can experiment with:
- Brand logos
- Slogans
- Monograms
- Symbols
- Illustrations
- Limited-edition artwork
- Seasonal designs
- Embroidered initials
A well-designed trucker cap can complement T-shirts, sweatshirts, jackets, and other apparel.
3. Promote an Event
Custom trucker caps are also useful for festivals, charity events, sporting occasions, business conferences, outdoor events, and promotional campaigns.
Instead of creating disposable promotional material, you can produce something people are more likely to continue using.
4. Create Something Personal
You don’t need to own a business to design custom trucker caps.
You could create caps for:
- A family event
- A wedding
- A bachelor or bachelorette party
- A hobby group
- A sports club
- A cycling group
- A fishing team
- A travel group
- A personal project
The possibilities are practically unlimited.
Step 1: Decide What Your Trucker Cap Is For
Before choosing colours or creating artwork, establish the purpose of the cap.
This is one of the most important steps because the intended use should influence almost every other design decision.
For example, a corporate cap may need a clean and professional appearance, while a streetwear cap might benefit from oversized graphics, bold colours, or 3D puff embroidery.
Ask yourself:
Who will wear the cap?
Where will they wear it?
What should the cap communicate?
Is the cap promotional merchandise or a retail product?
Should it look premium, casual, sporty, traditional, or fashionable?
Having clear answers makes the design process much easier.
Step 2: Choose the Right Trucker Cap Style
Not every trucker cap has the same construction.
One of your first decisions should be choosing the overall style.
5-Panel Trucker Caps
A five-panel trucker cap usually has one broad front panel, making it particularly attractive for large front graphics and logos.
The uninterrupted front can provide a clean visual canvas, especially when your artwork needs to appear centred.
Five-panel designs are often popular with:
- Streetwear brands
- Outdoor businesses
- Lifestyle brands
- Creators
- Promotional campaigns
6-Panel Trucker Caps
Six-panel caps typically have a centre seam running through the front.
They can create a traditional baseball-cap appearance and work well for many logos, but the centre seam needs to be considered during design.
If your artwork contains very fine details, precise geometric shapes, or text that must remain perfectly aligned, the seam can become an important consideration.
High-Profile Trucker Caps
High-profile trucker caps have a taller crown and generally create a more prominent appearance.
They can work particularly well for bold logos and larger designs.
Mid-Profile Trucker Caps
Mid-profile designs offer a more balanced appearance and can be suitable for customers who prefer a less exaggerated crown.
Your choice should ultimately depend on your target audience and the style you want your brand to communicate.
Step 3: Select the Front Material
The front panel is arguably the most important part of a trucker cap because it is usually where your main design appears.
Common options include foam, cotton, polyester, twill, and blended fabrics.
The material affects both the appearance and the way your design can be decorated.
For example, structured fronts generally provide a more stable surface for embroidery, while softer constructions may require simpler artwork.
Foam Fronts
Foam is strongly associated with the classic trucker-cap aesthetic.
It creates a smooth, structured surface that can work particularly well with bold designs.
Foam fronts are often suitable for:
- Large logos
- Simple typography
- Bold symbols
- 3D puff embroidery
- Retro-inspired designs
Cotton or Twill Fronts
Cotton and twill can create a more premium or natural appearance.
They are especially useful when you want your cap to feel less like traditional promotional headwear and more like a fashion product.
Polyester Fronts
Polyester can provide durability and consistent colour, making it suitable for sports, outdoor, promotional, and performance-oriented caps.
Step 4: Choose Your Mesh Back
The mesh back is one of the defining characteristics of a trucker cap.
Although it may seem like a secondary detail, the colour and texture of the mesh can significantly influence the overall appearance.
You can choose a contrasting colour for a bold look.
For example:
- Black front + black mesh = understated
- White front + black mesh = high contrast
- Navy front + white mesh = classic
- Red front + black mesh = bold
- Beige front + brown mesh = vintage
You can also match the mesh colour closely to the front panel for a more unified appearance.
When designing a cap for a fashion brand, don’t think of the mesh as simply the back of the hat. Treat it as part of the overall colour system.
Step 5: Pick Your Cap Colours Carefully
Colour is one of the first things people notice about a custom trucker cap.
Your colour choices should support the identity of your brand or design rather than competing with it.
If your business already has established brand colours, incorporating them into the cap is usually the easiest approach.
However, you don’t necessarily need to use every brand colour.
Sometimes a simpler approach works better.
For example, a brand with five corporate colours might create a much more sophisticated cap using only:
- One main cap colour
- One mesh colour
- One embroidery colour
Consider Contrast
Your logo should stand out from the front panel.
A dark logo on a dark cap may become difficult to see, while excessive contrast can make a design feel harsh.
Try different combinations before finalising the artwork.
Consider Your Audience
Bright neon colours might be perfect for a youth-focused streetwear label but less appropriate for a professional construction company.
Similarly, earthy colours could work beautifully for an outdoor brand but may not suit a technology company.
The colour palette should always match the personality of the brand.
Step 6: Design Your Logo for the Cap
One of the biggest mistakes people make is designing artwork for a flat screen rather than for an actual curved cap.
A logo that looks perfect on a computer monitor may not translate perfectly into embroidery.
The front of a trucker cap has limited space, and the surface is curved. Seams, crown shape, and material can all affect the final result.
This is why your artwork needs to be considered specifically for headwear.
Keep Important Elements Clear
Avoid placing critical details too close to the edges of the embroidery area.
Your design should have enough breathing room to look balanced.
Avoid Excessive Detail
Extremely detailed artwork can be difficult to reproduce cleanly at small sizes.
Fine lines, tiny text, intricate illustrations, and narrow gaps may need to be simplified.
Professional embroidery requires a digitised stitch file that determines stitch type, sequence, direction, density, and other production characteristics. Simply converting a PNG or JPG into an embroidery file isn’t enough.
Make Small Text Readable
Small lettering is one of the most common problems in cap design.
If your slogan contains several words, consider whether every word needs to appear on the front.
You could instead place:
- The main logo on the front
- A short slogan on the side
- A website or year on the back
This creates a more balanced design.
Step 7: Decide Where Your Design Should Go
The front isn’t your only option.
You can create a more sophisticated custom trucker cap by using multiple decoration locations.
Front
The front is normally the primary branding position.
Use it for:
- Main logo
- Brand name
- Main symbol
- Large graphic
- Statement design
Side
The side panel is useful for secondary branding.
You might place:
- Initials
- A small icon
- A year
- A secondary logo
- A short word
- A location
Because the side area is smaller, keep the design simple.
Back
The back can be used for subtle additional branding.
For example, you might put a short URL, slogan, year, or small logo above the closure.
The back area of a mesh trucker cap generally isn’t as suitable for large embroidery as the front, so keep your design appropriately scaled.
A useful design principle is:
Front = primary message
Side = supporting detail
Back = finishing detail
This prevents the cap from becoming visually overloaded.
Step 8: Choose the Right Decoration Method
Once you’ve created your artwork, decide how you want it applied.
The decoration method can dramatically change the appearance of the finished trucker cap.
Flat Embroidery
Flat embroidery is one of the most popular options for custom trucker caps.
It uses thread stitched directly onto the front panel.
It works especially well for:
- Logos
- Names
- Initials
- Simple graphics
- Corporate branding
- Sports designs
The raised texture of thread can give a cap a premium and professional appearance.
3D Puff Embroidery
3D puff embroidery creates a raised effect by adding foam underneath selected embroidered areas.
It is particularly effective for bold lettering and simple shapes.
It can be a strong choice for:
- Streetwear
- Fashion brands
- Sports logos
- Monograms
- Bold typography
However, not every design is suitable for puff embroidery. Fine details and very small lettering can become difficult to reproduce cleanly. Current embroidery guidance also recommends simplifying artwork and avoiding excessively narrow elements when designing for raised embroidery.
Embroidered Patches
Instead of embroidering directly onto the cap, you can create an embroidered patch and attach it to the front.
This can provide additional flexibility for complex designs.
Patches can also create a distinct visual style, particularly for:
- Outdoor brands
- Motorcycle groups
- Workwear
- Lifestyle brands
- Vintage-inspired products
Woven Patches
Woven patches can reproduce smaller details and finer lines than traditional embroidery in some applications.
They can be a good option when your artwork contains more detail than direct embroidery can comfortably handle.
Step 9: Think About Your Design’s Size
Size is just as important as artwork quality.
A design that is too small may become difficult to read.
A design that is too large can look crowded or interfere with seams and the shape of the cap.
Instead of simply saying “make the logo big,” work with actual dimensions and a physical sample where possible.
Your cap manufacturer or embroidery specialist can recommend an appropriate embroidery area based on the selected cap style.
Remember that a design needs to work on a curved three-dimensional object rather than a flat sheet of paper.
Step 10: Prepare Professional Artwork
For the best results, provide high-quality artwork.
Vector formats such as:
- AI
- EPS
- SVG
are often useful because they preserve clean shapes and allow artwork to be scaled without losing quality.
A high-resolution PNG can also be helpful for reference.
However, the final embroidery production file will normally need to be digitised specifically for the selected cap and decoration method.
This process determines how the machine will interpret your artwork.
A good digitiser considers factors such as:
- Stitch direction
- Stitch density
- Underlay
- Pull compensation
- Stitch sequence
- Thread changes
- Material behaviour
- Cap curvature
This is especially important because embroidery on a curved cap behaves differently from embroidery on a flat garment.
Step 11: Create a Strong Design Hierarchy
A professional trucker cap should have a visual hierarchy.
This simply means that some elements should attract attention before others.
For example:
Primary: Brand logo
Secondary: Small symbol
Tertiary: Year or slogan
If every element is equally large, equally bright, and equally detailed, the cap can quickly become confusing.
Instead, choose one dominant feature.
For many brands, that will be the front logo.
Everything else should support it.
Step 12: Don’t Overdesign Your Trucker Cap
One of the biggest advantages of trucker caps is their simplicity.
You don’t need to fill every available space.
A clean logo on a well-chosen cap can often look more professional than a design packed with text and graphics.
Try asking:
What is the one thing I want someone to notice first?
If you can’t answer that question, the design may need simplifying.
Minimal designs can be especially effective for fashion brands because they can look intentional rather than promotional.
Step 13: Consider Your Brand Personality
Your trucker cap should feel like part of your brand.
Different design choices communicate different personalities.
Classic
Use:
- Traditional colours
- Simple embroidery
- Curved brim
- Clean typography
Premium
Consider:
- Neutral colours
- High-quality fabrics
- Minimal branding
- Tonal embroidery
- Refined typography
Streetwear
Try:
- Oversized graphics
- Bold lettering
- 3D puff embroidery
- Contrasting colours
- Strong visual symbols
Outdoor
Consider:
- Earth tones
- Green
- Brown
- Navy
- Orange
- Adventure-inspired graphics
- Embroidered or patch-based designs
Corporate
Keep things:
- Simple
- Consistent
- Professional
- Easy to recognise
The design should feel natural within the environment where your customers will wear it.
Step 14: Think About the Brim
The brim is another important part of the overall aesthetic.
You can generally choose between a curved brim and a flatter brim depending on the cap style.
A curved brim tends to create a traditional, casual appearance.
A flatter brim can feel more contemporary or streetwear-inspired.
You can also experiment with underbill colours.
A contrasting underbill can add a subtle design detail without overwhelming the main logo.
Step 15: Choose the Right Closure
Trucker caps are commonly associated with snapback closures, but the closure itself can also become part of your design.
The most common choice is a plastic snap closure.
Advantages include:
- Adjustable fit
- Familiar trucker aesthetic
- Easy sizing
- Practicality
- Multiple colour options
When choosing the closure colour, you can either match the mesh or contrast it.
For a more cohesive design, matching the closure to the mesh often works well.
Step 16: Order a Sample Before Bulk Production
If you’re ordering a large quantity of custom trucker caps, a sample is one of the smartest investments you can make.
A digital mockup can show you the general appearance, but it can’t completely reproduce:
- Thread texture
- Cap curvature
- Fabric feel
- Embroidery density
- Actual colours
- Logo scale
- Stitch quality
A physical sample allows you to evaluate the actual product before approving a larger production run.
This is especially useful for businesses launching a new product or clothing brands preparing their first collection.
Common Trucker Cap Design Mistakes
Mistake 1: Using Too Much Detail
Intricate designs don’t always translate well to embroidery.
Solution: Simplify the artwork and prioritise the most important elements.
Mistake 2: Making Text Too Small
Tiny text may look clear on your monitor but become difficult to read once embroidered.
Solution: Increase the text size or remove unnecessary wording.
Mistake 3: Ignoring the Cap Shape
A flat artwork file doesn’t show how the design will behave on a curved crown.
Solution: Review the artwork on an accurate cap mockup and, ideally, approve a physical sample.
Mistake 4: Using Too Many Colours
Multiple thread colours can make a simple design feel complicated.
Solution: Start with two or three colours and add more only when necessary.
Mistake 5: Placing Artwork Too Close to Seams
Seams can interfere with embroidery and reduce visual balance.
Solution: Keep important artwork within a safe central area.
Mistake 6: Choosing the Wrong Decoration Method
A detailed logo forced into 3D puff may lose its clarity.
Solution: Match the decoration technique to the artwork.
Mistake 7: Designing Only the Front
A custom cap can look much more considered when the side and back have subtle supporting details.
Solution: Think about the complete 360-degree design.
How to Design a Trucker Cap for a Clothing Brand
If you’re creating trucker caps for a fashion label, think beyond simply placing your logo on a blank hat.
Your cap should feel like a product.
Consider developing a collection with several variations.
For example:
Collection 1: Minimal
- Black cap
- Black mesh
- Small tonal logo
- Curved brim
Collection 2: Classic
- Two-tone front
- Contrasting mesh
- Medium embroidered logo
- Traditional snapback
Collection 3: Statement
- Bold front artwork
- 3D puff embroidery
- Contrasting thread
- Strong colour combination
This approach gives customers choices while maintaining a consistent brand identity.
How to Design Trucker Caps for Businesses
For businesses, the priority is usually recognition.
Your logo should be easy to identify from a reasonable distance.
Avoid overcrowding the front with contact information.
Instead, use your primary logo on the front and consider placing a website, slogan, or secondary mark elsewhere.
For example:
Front: Company logo
Side: Company initials
Back: Website or slogan
This creates a professional look without turning the cap into a billboard.
How to Design Trucker Caps for Events
Event caps can be more creative.
You could include:
- Event name
- Date
- Location
- Event logo
- Sponsor logo
- Special edition number
However, try not to include every piece of information on the front.
A cleaner approach might be:
Front: Event logo
Side: Year
Back: Location
This gives the cap a souvenir-like appearance rather than making it look like temporary promotional merchandise.
How to Make Your Trucker Cap Look Premium
Premium design isn’t necessarily about adding more decoration.
In many cases, premium appearance comes from restraint.
Consider:
- High-quality materials
- Clean embroidery
- Consistent colours
- Simple typography
- Balanced spacing
- Quality closures
- Carefully selected thread
- Well-finished edges
- Accurate logo placement
The quality of the construction should support the design.
A simple logo embroidered cleanly on a quality cap can look considerably more premium than an elaborate design executed poorly.
Trucker Cap Design Trends for 2026
Trucker caps continue to adapt to modern fashion and branding trends.
Some design directions worth exploring include:
Minimal Branding
Small, understated logos are increasingly useful for brands that want a sophisticated appearance.
3D Puff
Raised embroidery remains a strong option for bold logos and streetwear-inspired designs.
Vintage Aesthetics
Retro typography, faded colours, heritage graphics, and classic two-tone trucker designs continue to work well for lifestyle and outdoor brands.
Earthy Colour Palettes
Olive, beige, brown, cream, charcoal, and muted green can create an outdoors-inspired or premium casual aesthetic.
Personalised Designs
Initials, names, locations, dates, and limited-edition numbers can make trucker caps feel more exclusive.
Patch-Based Branding
Embroidered and woven patches provide another way to create distinctive, tactile designs.
The important point is not to follow every trend. Choose elements that make sense for your audience and brand.
A Simple Trucker Cap Design Formula
If you’re unsure where to start, use this simple formula:
Step 1
Choose your cap profile.
Step 2
Select the front fabric.
Step 3
Choose the mesh colour.
Step 4
Pick the brim style.
Step 5
Select your brand colours.
Step 6
Prepare your logo.
Step 7
Choose embroidery, puff embroidery, or a patch.
Step 8
Determine the front logo size.
Step 9
Decide whether you need side or back branding.
Step 10
Review a professional mockup.
Step 11
Request a physical sample if required.
Step 12
Approve the final design for production.
This process helps prevent expensive mistakes and ensures that every element of the cap works together.
Why Professional Digitising Matters
One of the most important parts of custom embroidered trucker cap production happens behind the scenes.
Your artwork needs to be converted into a stitch-based format that an embroidery machine can understand.
A professional digitiser doesn’t simply trace the logo.
They decide:
- Which areas should be stitched first
- Which stitch type should be used
- How dense each section should be
- Where underlay is required
- How the design will respond to pull and push forces
- How the curved cap surface will affect the artwork
Poor digitising can lead to problems such as puckering, distorted shapes, uneven lettering, thread breaks, and poor registration.
Good digitising helps the finished cap look clean and intentional.
This is why the quality of the embroidery file can be just as important as the original artwork.
Final Checklist Before Ordering Your Custom Trucker Caps
Before approving your design, check:
- Is the cap style suitable for your audience?
- Does the front panel support your chosen decoration method?
- Is the logo easy to recognise?
- Is the artwork simple enough for the selected size?
- Is the text large enough to remain readable?
- Do the colours provide enough contrast?
- Does the mesh complement the front?
- Is the brim style appropriate?
- Is the logo positioned correctly?
- Have you considered side or back decoration?
- Is the embroidery method suitable for the artwork?
- Have you reviewed a realistic mockup?
- Would you benefit from ordering a sample?
- Does the finished cap represent your brand?
If the answer to all of these questions is yes, you’re much closer to creating a trucker cap that people will actually want to wear.
Design Your Own Custom Trucker Caps With CustomCap.uk
Designing your own trucker cap gives you the opportunity to create something that is much more than basic promotional headwear.
From the cap profile and mesh colour to the front logo, embroidery technique, patches, closure, and finishing details, every choice contributes to the final product.
The key is to design for the actual cap rather than simply designing a logo and placing it on a mockup. Consider the shape of the crown, the available decoration area, the material, the size of your artwork, and how your chosen decoration method will reproduce the design.
At Custom Cap uk, our goal is to help brands, businesses, organisations, creators, and individuals turn their ideas into custom headwear that looks professional and reflects their identity.
Whether you want a classic embroidered trucker cap, a bold 3D puff design, a vintage-inspired patch cap, or a completely customised branded collection, the right planning can make the difference between an ordinary cap and a product people are genuinely excited to wear.
Ready to create your own trucker caps? Start with your idea, refine your artwork, choose the right cap style, and let the design become something people can wear, remember, and share.
Frequently Asked Questions
What is the best logo size for a trucker cap?
The ideal logo size depends on the cap profile, front-panel dimensions, artwork, and decoration method. Rather than using one universal measurement, your design should be scaled according to the actual cap and embroidery area.
Can I put a detailed logo on a trucker cap?
Yes, but extremely fine details may need to be simplified when using embroidery. Small text, thin lines, and tightly packed elements can become difficult to reproduce clearly.
Is embroidery good for trucker caps?
Yes. Structured trucker fronts can provide a stable surface for embroidery, making the technique particularly suitable for logos, lettering, and bold graphics.
Can I use 3D puff embroidery on a trucker cap?
Yes. 3D puff can work particularly well on structured trucker fronts when the artwork uses sufficiently bold shapes. Fine details and tiny lettering are generally better suited to flat embroidery.
Can I put branding on the side of a trucker cap?
Yes. Side embroidery can be useful for secondary logos, initials, dates, locations, or small symbols. Because the side area is smaller, simple designs usually work best.
Should I order a sample before a large quantity?
If you’re producing a substantial quantity or launching a new product, a physical sample is highly recommended. It lets you assess the actual cap construction, embroidery, colours, fit, and overall appearance before approving production.
Can I create a trucker cap without embroidery?
Absolutely. Depending on your design, you can explore embroidered patches, woven patches, printed patches, or other decoration options. The best choice depends on your artwork, budget, desired appearance, and intended use.
What file should I provide for my logo?
Vector artwork such as AI, EPS, SVG, or a suitable PDF is generally helpful. A high-resolution PNG can also be useful as a reference. Your artwork will still need to be prepared or digitised appropriately for the chosen decoration method.
How can I make my trucker cap look more premium?
Focus on quality rather than excessive decoration. Use a well-constructed cap, carefully selected colours, clean artwork, balanced placement, high-quality embroidery or patches, and a design that doesn’t feel overcrowded.
What makes a good custom trucker cap design?
A successful design combines a suitable cap style, strong colour choices, readable artwork, appropriate decoration, good proportions, and consistent branding. Most importantly, it should look good on an actual cap not just on a computer screen.